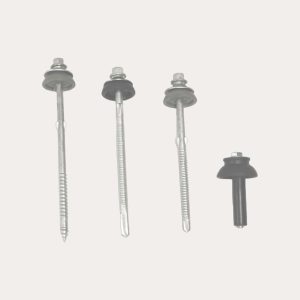
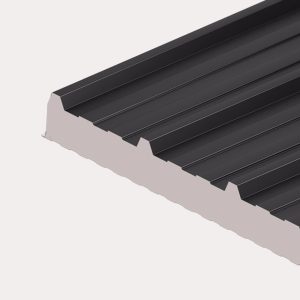
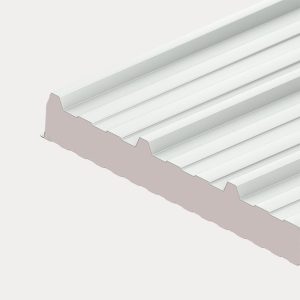
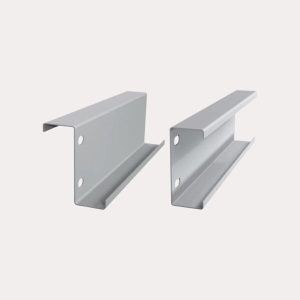
A metal roof can look fully sheeted and still have vulnerable gaps at the eaves and ridge. Learning how to install foam filler strips correctly closes those profile-shaped openings, helping stop wind-driven rain, leaves, birds and insects getting beneath the sheets. It is a small detail, but one that makes a major difference to the finished roof.
Foam fillers are not a substitute for correct overlaps, flashings or fixings. They are part of the complete weatherproofing system. Fit the right type in the right position and they create a tidy, close-fitting seal without restricting the sheet profile or making the job harder than it needs to be.
What foam filler strips do
Foam filler strips, often called foam closures, are shaped to match the ribs and valleys of a roofing sheet profile. Once placed beneath or above the sheet at key junctions, they fill the irregular spaces left by the profile. A box profile sheet, corrugated sheet and tile-effect sheet all need their own matching filler shape.
Their main job is to keep unwanted weather and debris out. At the lower eaves, an outer filler prevents rain being pushed uphill by strong winds and stops pests entering the roof void. At the ridge, an inner filler closes the top of the sheet beneath the ridge flashing. This gives the ridge a much cleaner, more secure finish.
They can also reduce draughts through open-sided agricultural buildings, workshops, garages and stables. That said, a fully sealed roof is not always the right answer. Buildings that need planned ventilation, particularly insulated roofs and animal housing, must have a suitable ventilation design rather than relying on accidental gaps beneath the ridge.
Choose filler strips to match the sheet profile
The most common cause of poor results is ordering a filler that looks similar but does not match the roofing sheet. Foam closures are profile-specific, so the pitch, rib spacing, rib height and sheet orientation all matter. A filler made for one box profile will not necessarily suit another, even when the sheets appear alike from a distance.
Before ordering, confirm the exact sheet profile and whether you need an eaves filler, ridge filler, or both. The terms outer and inner are useful here. Outer fillers normally sit beneath the sheet at the eaves, following the underside of the profile. Inner fillers generally sit on top of the sheet at the ridge, beneath the ridge flashing. The shape is reversed because the closure is sealing from the opposite side.
Measure the total width of the roof run rather than simply counting sheets. Allow for the actual cover width, side laps and any cut sheets at the end of the run. Foam strips are easy to trim, but buying too few can leave the final section exposed while the rest of the roof is complete.
If you are fitting rooflights, changes in profile direction, valley flashings or unusual junctions, check the detail before cutting anything. These areas may need a combination of closure strips, sealing tape and correctly formed flashings to remain weatherproof.
Prepare the roof before fitting
Fit foam fillers only after the sheets are correctly positioned, squared and fixed to the purlins. If the sheet line is uneven, the closure will follow that error and can create a patchy seal. Check that the eaves line is straight, sheet overhang is consistent and every fixing is in the correct position before moving on.
The sheet surface should be clean and dry where adhesive-backed fillers will be applied. Remove swarf, drilling debris and moisture first. Steel swarf left on coated roofing sheets can rust and stain the finish, so this is good practice regardless of whether you are using fillers.
Have the ridge flashings, eaves flashing and any verge or barge components ready before starting. Foam fillers are quick to fit, but they should be installed as part of a continuous sequence, not left exposed for days while other components are sourced.
How to install foam filler strips at the eaves
Start at one end of the roof and dry-fit the filler along the eaves before removing any backing paper. The strip should sit directly beneath the roofing sheet, with each raised section and valley aligned to the profile. Do not stretch the foam to make it reach. It should lie naturally and consistently from one end to the other.
Where the product has a self-adhesive face, peel back a short section of the release liner and press the strip into place. Continue gradually rather than exposing the full adhesive length at once. This gives you more control and prevents the strip sticking in the wrong position.
Butt the ends of adjacent strips closely together. Do not leave gaps, and do not overlap them so heavily that they lift the sheet. A clean butt joint will compress once the sheet is fixed down and provide a continuous seal.
Once the filler is located, secure or complete the sheet fixing arrangement as specified for the profile and building. The foam should be compressed enough to seal the gaps, but not crushed flat. Over-compression can distort the profile, reduce the seal’s effectiveness and make the sheet sit unevenly at the eaves.
How to install foam filler strips beneath a ridge
Ridge fillers are fitted after the roof sheets are in place and before the ridge flashing is fixed. Position the strip along the top edge of the sheet where the ridge flashing will cover it. Again, follow the sheet profile exactly and work from one end of the ridge to the other.
For a standard closed ridge detail, press the foam strip firmly onto the clean sheet surface, then place the ridge flashing over it. Fix the flashing through the appropriate points of the sheet profile and into the supporting structure, using suitable stitching screws or other specified fixings. Keep the fixing line straight so the ridge looks as good as it performs.
Do not use a solid foam closure where the roof design calls for a ventilated ridge. Ventilated systems need compatible vented closures or ridge ventilation components that allow air to move while resisting rain and pests. This is particularly relevant where condensation control is required or where a roof build-up has been designed to ventilate the void.
On a dual-pitch roof, repeat the detail on both sides. Check that ridge flashing overlaps face away from the prevailing weather direction where practical, and seal joins in accordance with the flashing detail. The filler is only one part of the ridge system, so the overlaps and end caps still need proper attention.
Cutting, joining and working around details
Most foam strips can be cut cleanly with a sharp utility knife or strong scissors. Make cuts square, especially where strips meet a verge, rooflight upstand or flashing return. A ragged or angled cut can leave a route for wind-blown water and insects.
At verges and corners, avoid trying to force one piece of foam around a tight turn. Cut separate sections to suit the detail and make sure each section finishes neatly against the adjoining flashing. On longer runs, keep joints tight and check the alignment regularly. A strip can drift out of line surprisingly quickly if it is applied by eye over several metres.
Where sealant is specified, use it sparingly and in the correct location. A bead of compatible butyl sealant may be needed at a flashing lap or awkward junction, but foam filler strips should not be coated in sealant as a way to compensate for the wrong profile or poor sheet alignment.
Common fitting mistakes to avoid
A correctly specified filler is straightforward to fit, but a few shortcuts can spoil the detail. Watch for these common issues:
- Using a closure strip designed for a different sheet profile.
- Fitting outer and inner fillers in the wrong locations.
- Leaving small gaps between strips at joints or ends.
- Compressing the foam so tightly that the roof sheet distorts.
- Blocking a ridge that has been designed to provide ventilation.
It is also worth checking that the sheet ends have not been cut short. Foam fillers close the profile gaps, but they cannot compensate for insufficient sheet overhang at the eaves or a ridge flashing that does not provide adequate cover.
Get the complete roof detail right
Foam fillers work best when specified alongside the rest of the roof system: sheets, purlins, fixings, flashings, sealants and ventilation components. Buying these parts together reduces the risk of mismatched profiles and last-minute substitutions on site.
For a shed or simple garage, the requirement may be a straightforward eaves and ridge closure. For an insulated workshop, stable or commercial roof, the choice may depend on condensation control, ridge ventilation, fire performance and the precise flashing arrangement. It pays to check the detail before materials arrive, especially on a larger build.
Roof Sheets Online can help identify compatible accessories for the sheet profile you are using, so you can order a properly matched, weatherproof roof build rather than piecing together near-matches. A few minutes spent confirming the closure detail now can save a return visit when the first spell of driving rain finds an overlooked gap.