
If you have ever had a “mystery drip” on a metal roof that only shows up when the wind swings round, the culprit is often the same place – the verge edge. It is the most exposed line of the roof, it takes the brunt of wind-driven rain, and it is where air tries to get under sheets and lift them. Get the bargeboard detail wrong and the roof can still look tidy from the ground while quietly letting water track back.
Bargeboard flashing is the fix. Done properly, it locks down the verge, protects the edge of the sheet, and gives you a clean finish that stands up to British weather.
On a pitched roof, the verge is the sloping edge where the roof ends at the gable. On many sheds, garages, stables and workshops there is a timber bargeboard running up that edge. With metal roofing, you need a formed flashing (often called a bargeboard flashing, verge flashing or barge trim) that bridges between the roof sheet and that verge detail.
A good bargeboard flashing for metal roof work does three jobs at once.
First, it throws water away from the edge so it cannot blow up and under the sheet laps. Wind does not push rain straight down – it pushes it sideways and upwards, and the verge is where it tries to get in.
Second, it protects the vulnerable cut edge of the sheet. Even with coated steel, the cut edge is where corrosion starts if it is repeatedly wetted and allowed to hold debris.
Third, it stiffens the edge and reduces wind lift. Metal sheets are strong when fixed correctly, but the very edge can “flutter” if it is left exposed, especially on longer runs.
You need verge protection on almost every pitched metal roof, but there are a few scenarios where it stops being a nice-to-have and becomes essential.
If you are in an open, exposed location – coastal, hilltop, or simply a site with no shelter – wind-driven rain will test every detail. The verge is always first in line.
If the roof pitch is low, water drains slower and can sit near edges and laps for longer. That makes the verge more vulnerable to capillary action and blown rain.
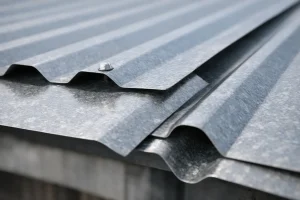
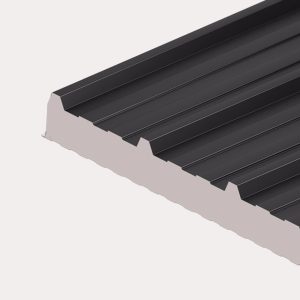
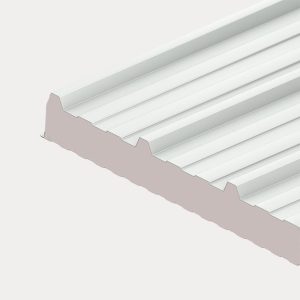
If you are using corrugated or box profile sheets, the profile ribs create voids that must be closed properly at the verge. Without closure and correct overlap, you can end up with water tracking along the underside of the sheet.
If the building is heated or used for animals (stables, tack rooms, workshops), airflow and pressure changes can increase the chance of wind getting under the sheets at the edge.
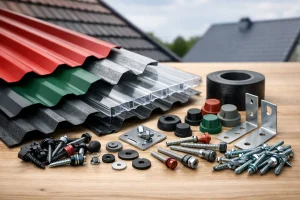
Most verge flashings for steel sheets are a simple folded shape with two legs.
Sometimes there is a small kick or return at the bottom of the vertical leg to stiffen it and help water drip clear. On higher-end details, a foam closure and tape system completes the seal where the flashing meets the sheet profile.
The key is not the name of the trim, it is the geometry. You want enough cover on the roof side to stop driven rain getting under it, and enough drop on the verge side to protect the timber and any fascia detail.
Most problems with verge trims come from ordering “something that looks about right”. It often is not.
Start with the roof sheet profile and the height of its ribs. Corrugated and box profile sheets need the flashing to sit down tight onto the high points without leaving open voids. That usually means using profiled foam fillers or a sealing tape system, rather than hoping a flat flashing will magically seal.
Next, measure the distance you want the flashing to cover down the bargeboard. If the timber is already painted and you want a neat finish, you might only need a modest drop. If the bargeboard is raw timber or the building is very exposed, a deeper drop gives better protection and looks more substantial.
Then think about the roof-side overlap. Too small and it becomes decorative rather than weatherproof. Too large and you can end up fighting the sheet ribs and creating oil-canning or a wavy line.
Finally, confirm whether the verge is on the “windward” side of the building. On many sites, one verge takes far more punishment. That is where you want to be extra fussy about closures, tape, and fixings.
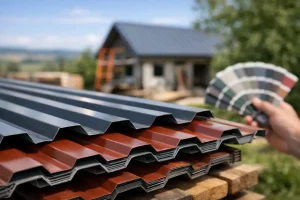
Most bargeboard flashings are made in coated steel to match the roof sheets. That gives you a consistent look and a compatible lifespan.
If you are using polyester-coated sheets, a matching polyester flashing is a sensible choice for a cost-effective job. If you are using Plastisol, you will usually want Plastisol flashings for improved durability, especially on agricultural and coastal builds.
Galvanised flashings are common on farm buildings and utility roofs where appearance is less critical, but you still want the detailing right. A galvanised verge trim will still corrode if water is allowed to sit at an edge – the profile fit and sealing matter as much as the coating.
Aluminium trims can be useful in certain environments, but the fixing approach and compatibility with other metals should be considered. If in doubt, match the flashing material to the sheet system you are installing and keep the whole build consistent.
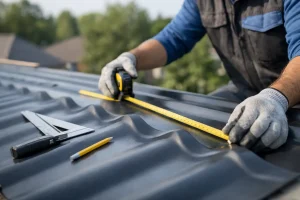
A verge trim is easy to fit badly and surprisingly easy to fit well if you follow the order of operations.
You want the roof sheets set out straight with correct overhang first. If the sheet line wanders, your flashing will highlight it. Set a string line or laser and make sure the verge edge is true before you start trimming.
The flashing should generally lap over the sheet, not tuck underneath it. Lapping keeps water on the outside surface where it belongs. The only time you change that approach is if the roof system and manufacturer’s details specify otherwise, for example on certain insulated panel verge details.
Use a proper seal to the profile. For corrugated and box profile, that means foam closures shaped to the profile or a suitable sealing tape approach. Without it, you are leaving channels open at every rib. In calm weather you might never notice, then the first proper sideways rain finds its way in.
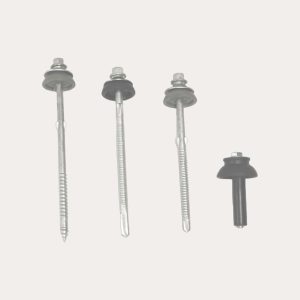
Fix the flashing through the high points of the sheet where possible, using the correct roofing fixings with sealing washers. Over-tightening is a common mistake. You want the washer compressed enough to seal, not squashed until it splits or deforms.
At joints, lap the flashings in the direction water will run off the roof. Keep laps neat and consistent. A small bead of sealant at laps can help in very exposed locations, but it is not a substitute for correct lap direction and adequate overlap.
Finally, treat the verge like a system, not a single trim. If your ridge, eaves and verge details do not work together, you can accidentally create a path for wind to pressurise the roof space and drive moisture where you do not want it.
A few fitting habits tend to show up again and again on remedial jobs.
The first is leaving the profile voids open. You might not see water immediately, but you will often see damp marks on sarking, staining on timbers, or drips that only appear during storms.
The second is ordering a trim with too shallow a drop, then relying on sealant down the bargeboard. Sealant weathers, timber moves, and the joint fails. A deeper, correctly formed drop is a more reliable answer.
The third is using the wrong fixings or spacing them too far apart near the verge. The edge of the roof takes higher wind loads, and fixings at the verge are doing real work.
The fourth is cutting sheets roughly at the verge and expecting the flashing to hide it. Flashings should cover and protect, but they cannot correct poor set-out. A wavy cut will still telegraph through the finished line.
If you are fitting insulated roof panels (including composite systems used on workshops, commercial units or higher-spec outbuildings), verge detailing can be different. Panel thickness, side-lap design, and the need to maintain airtightness can introduce extra components like side closures and specific verge caps.
With fibre cement or flat sheet systems, barge detail still matters, but the trim profile and fixing approach differ. The principle stays the same: control water at the edge, protect cut edges, and keep wind out.
If your roof build includes a breathable membrane, make sure it is dressed correctly to the verge so any moisture that does get behind the sheets is directed safely out, not into the wall build-up.
Bargeboard flashing tends to be ordered late, after sheets are on site and someone realises the edge looks unfinished. That is how delays happen.
A cleaner approach is to order the verge flashings alongside the roof sheets, fixings, closures and tapes so the installer can complete the weathering details in one visit. Roof Sheets Online Ltd stocks roof sheets, flashings, fixings and the supporting components as a one-stop order, with UK-wide delivery and phone support if you want to sense-check the detail before you commit at https://www.roofsheetsonline.co.uk.
If you are not sure what verge trim suits your profile, the fastest way to avoid mistakes is to confirm the sheet type, roof pitch, building exposure and the drop you want on the bargeboard. From there, the correct flashing shape and lengths become straightforward.
A well-fitted bargeboard flashing is not the most visible part of the roof, but it is one of the most tested. Treat the verge like the frontline it is, and the rest of the roof system tends to behave itself for years.
Roof Sheets Online Ltd
UNIT C4
MACROME ROAD
Wolverhampton
WV6 9HD
Company No 15150940
Vat No. 4880 70856