A roof that looks straight and stays dry usually comes down to the bits people rush – the junctions. Sheets do the heavy lifting, but it is the flashings and trims that decide whether wind-driven rain finds a way in, whether your eaves line looks sharp, and whether that new cladding job reads as “trade fitted” or “nearly”.
This is a practical guide to roofing sheet flashings and trims – what they do, where they go, what to specify, and the fitting habits that prevent call-backs.
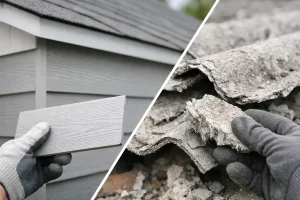
Flashings and trims are the formed components that close, cap, and protect edges and junctions around profiled metal sheets, fibre cement sheets, insulated panels, and rooflights. Some are about weathering, some are about strength, and some are simply about finishing – but most do more than one job.
At the ridge, they stop water blowing up and over the apex and help keep the roof space calmer in high winds. Along eaves and verges they control where water runs, protect vulnerable sheet ends, and stop birds and debris getting under the sheets. At a wall abutment or chimney, they create a stepped, sealed path that pushes water back out onto the roof rather than into the building.
The trade-off is that trims only work as designed when they match the sheet profile and are fitted in the right sequence. A “close enough” ridge or verge can look acceptable from the ground and still leave capillary gaps that pull water in during a storm.
When people say “flashings”, they often mean everything that is folded. In reality, each piece has a job, and choosing the right one saves time on site.
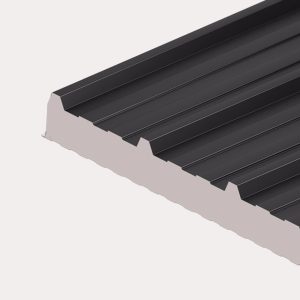
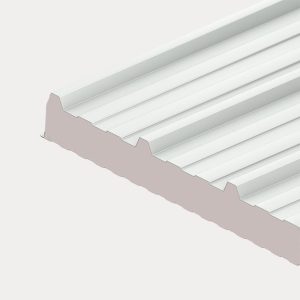
A ridge flashing covers the apex where two roof slopes meet. On box profile and corrugated sheets, a standard ridge is usually paired with shaped fillers (foam closures) that match the profile. Without closures, you are relying on sealant and luck.
You will also see purpose-made ridges for specific systems, including insulated panel ridges and ridges designed to work with rooflights. If you are mixing rooflights into profiled sheets, ridge detailing is one of the first places installers get caught out, because the thickness and profile heights can change.
Verge trims (often called bargeboards on sheeted roofs) finish the gable edge. They protect the sheet edge, tidy up the cut line, and help stop wind uplift by clamping down the outer edge.
It depends on your roof build-up. Some verges are designed to sit over the sheet edge and fix into the barge board; others return down over wall cladding to close the corner. If you are cladding walls as well as roofing, it is worth thinking about roof and wall junctions together so the corner details line through.
Eaves details control the first and last place water travels. An eaves flashing can kick water into the gutter and stop it tracking back under the sheet. A drip trim is often used where there is no gutter, for example on agricultural shelters, lean-tos, or small outbuildings.
If condensation control matters (and on uninsulated sheeted roofs it usually does), the eaves area is also where you need a clear plan for ventilation and anti-condensation linings. Trims can help, but they cannot fix a roof that has no airflow path.
These are not “trim” in the visible sense, but they are part of the system. Profile fillers close the gaps created by corrugations or ribs at ridges, eaves, and sometimes at hips. They reduce water ingress, draughts, and pest entry.
There is a judgement call here: on some open-sided structures you might accept more airflow and fewer closures. On a workshop, stable, or garage where you want it drier and cleaner, closures are normally money well spent.
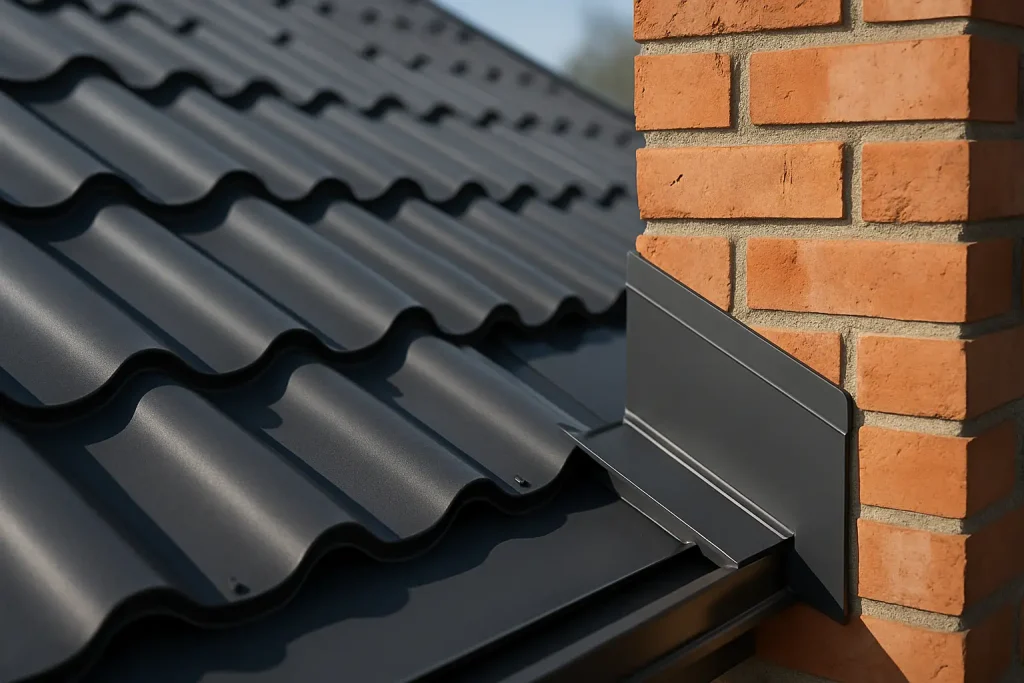
Wall abutments are the classic leak point. A typical detail uses an apron flashing where the roof meets a wall, sometimes combined with a secret gutter or back gutter depending on the roof pitch and exposure.
What matters is the upstand height against the wall, the lap direction, and how you terminate into the wall (chased and wedged, or mechanically fixed and sealed). If you are fitting sheets against old brickwork, be realistic about how flat it is. A wavy wall can defeat a perfectly folded flashing unless you allow for it.
Valleys collect a lot of water in one place, so they need the right shape, the right laps, and clean fixing lines. Hips are similar to ridges but on an external angle. Both need profile closures where the sheet ribs create voids.
On complex roofs, valleys and hips are where you decide whether you want a purely “sheeted” solution or whether a membrane-backed build-up makes more sense. The more junctions you have, the more every small gap matters.
A box profile ridge does not sit correctly on corrugated sheets, and a corrugated closure will not seal against a box profile rib. This sounds obvious, but it is the most common ordering mistake, especially when a roof is being patched or extended and the existing sheets are not clearly identified.
If you are not sure, measure the profile pitch and height and take a clear photo square-on. It saves a lot of time versus trying to “make it work” with sealant.
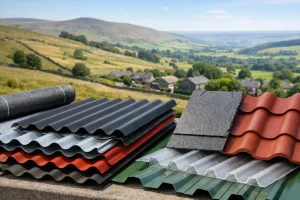
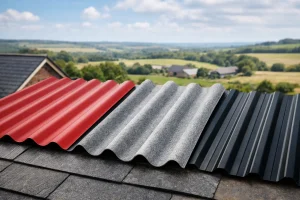
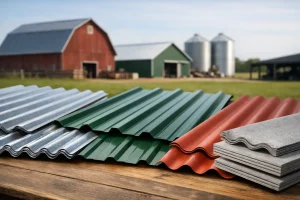
Most standard metal flashings are made from coated steel to match the sheets. Polyester is a solid all-round finish for many domestic and light commercial projects. Plastisol is thicker and tougher, often chosen for agricultural and harsher environments where abrasion and weathering are more punishing. Galvanised can be appropriate where aesthetics matter less and you want a classic industrial look.
The trade-off is cost versus longevity and appearance. If you are fitting premium coated sheets, mismatching trims in a cheaper finish can make the whole job look downgraded, and it can age differently over time.
Even when colours have the same name, shades can vary slightly between manufacturers and production runs. If the roof is visible and you care about a clean finish, order sheets, trims, and accessories together. It is the easiest way to keep colour and sheen consistent.
Thicker flashings feel more substantial and hold a straighter line along long runs. On exposed sites, stiffness also helps reduce vibration and drumming. That said, thicker is not always easier – it can be harder to dress neatly against uneven masonry and may need more careful handling to avoid kinks.
The best detailing is simple and repeatable. Most issues come from rushing laps, fixing through the wrong faces, or relying on sealant to replace proper closure.
Start by planning your sequence. Sheets first is not always correct if you have valleys, back gutters, or complicated abutments. Dry fit the main junction pieces so you can see where laps will land before anything is permanently fixed.
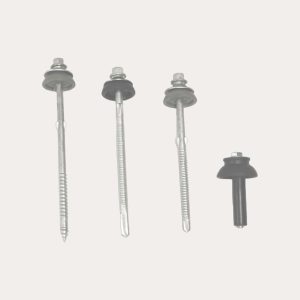
Fixings matter. Use the right type (self-drilling, stitching screws, or rivets depending on the detail), and do not mix metals in a way that encourages corrosion. Washers should compress, not split, and fixings should be straight – angled fixings tend to oval the hole and loosen over time.
Sealants and butyl tapes are there to support the detail, not rescue it. A good lap with the correct overlap, correct direction, and a clean, dry surface will outlast a messy bead of silicone every time. If you are fitting in cold weather, remember that some sealants behave differently and surfaces can be damp even when it “looks dry”.
Allow for movement. Long metal runs expand and contract. Over-fixing trims, or pinning both ends tight without thought, can lead to oil-canning, noise, and pulled fixings. If the manufacturer detail allows for it, leave the right clearances and use the fixing pattern intended.
Most ordering issues come from missing one of the junctions, or assuming a standard trim covers every situation.
Measure your roof properly, including overhangs and gable returns, and list each edge condition: ridge length, both verges, eaves, any abutments, any valleys, and any corners where roof meets wall cladding. If you have rooflights, note where they start and finish, because their flashing requirements can differ from the steel sheets.
Also think about closures, tapes, and fillers early. They are small-cost items that can hold up a job if forgotten, and they are the difference between “weatherproof” and “mostly fine unless the wind is in the wrong direction”.
If you want a one-supplier order that covers sheets, trims, closures and fixings in matching finishes, that is exactly the sort of job we support at Roof Sheets Online Ltd – and if you are unsure on a junction detail, it is worth asking before you place the order rather than discovering it halfway through an install.
A lean-to on a sheltered garden wall does not need the same level of detailing as a ridge on an exposed coastal site. Wind-driven rain, roof pitch, and building use change what “good enough” looks like.
Lower pitches generally demand more care at laps and junctions because water drains more slowly and is more likely to track sideways. Agricultural buildings and stables often need tougher coatings and more attention to corrosion resistance. Heated workshops and garages are where condensation control becomes a priority, because warm moist air meets cold sheet surfaces and finds the easiest exit route – usually at poorly closed eaves and ridges.
If you are balancing budget, prioritise the junctions that see the most water and wind: ridges, abutments, valleys, and eaves. A neat verge is nice, but a weak abutment detail is where you will pay twice.
If you want a roof that stays quiet, dry, and tidy for years, spend the extra half hour on the edges. Roofing sheet flashings and trims are not the glamorous part of a build, but they are the part you end up staring at when the weather turns – and the part that proves whether the job was fitted properly.
Roof Sheets Online Ltd
UNIT C4
MACROME ROAD
Wolverhampton
WV6 9HD
Company No 15150940
Vat No. 4880 70856