A leaking verge rarely starts with a dramatic failure. More often, it begins with a small gap at the roof edge, a loose fixing, or a flashing that never quite matched the sheet profile in the first place. If you need to install roof sheet verge flashing properly, the job is not just about tidying the edge. It is what keeps wind-driven rain out, protects cut sheet ends, and gives the whole roof a clean, finished line.
On garages, sheds, workshops, stable blocks and light industrial roofs, verge flashing has a simple but important role. It closes off the side edge of the roof sheets where they meet the gable end. Done well, it improves weather resistance and appearance in one go. Done badly, it can rattle in the wind, trap water, or leave the edge vulnerable.
What verge flashing does on a sheeted roof
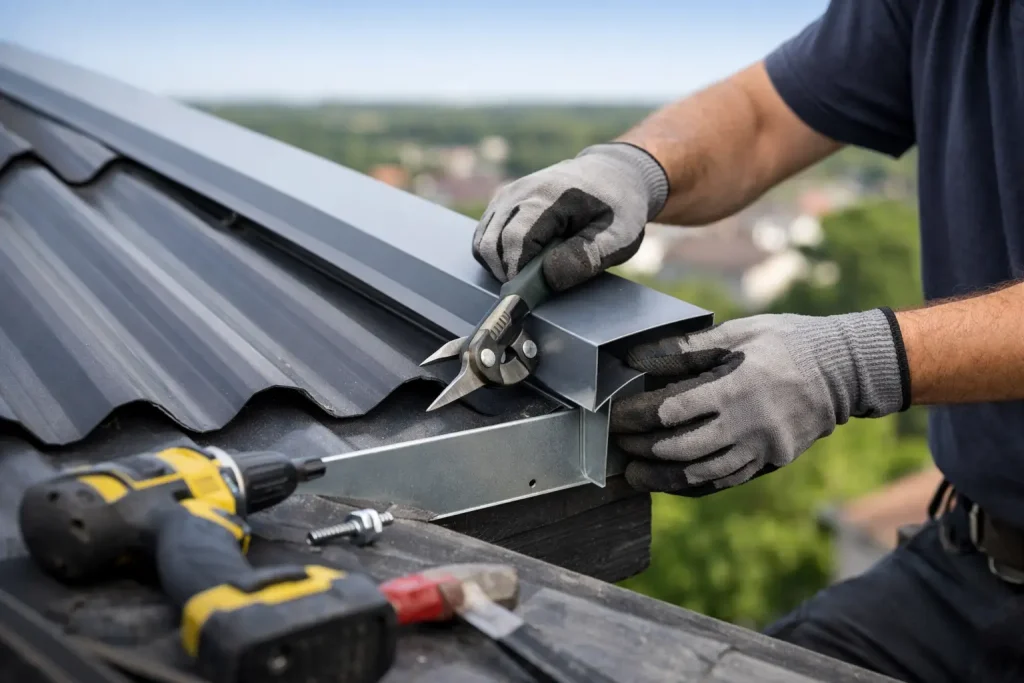
Verge flashing is the trim fitted along the sloping edge of a roof, usually on the left and right-hand gable ends. On profiled metal roofing, it covers the exposed edge of the roof sheets and helps stop water being driven beneath them. It also reduces wind uplift at the perimeter, where roofs are under the most pressure.
That matters more than many people think. Roof edges take the worst of the weather, especially on exposed sites and agricultural buildings. The flashing needs to suit the roof pitch, the sheet profile and the supporting detail underneath. A generic trim forced into place often looks wrong and performs worse.
If you are ordering materials for a new build or refurbishment, this is where buying the sheets, fixings and flashings together makes life easier. Matching profile, finish and dimensions from one supplier reduces the usual site headaches.
Before you install roof sheet verge flashing
The best fitting jobs are usually decided before the first fixing goes in. Start by checking the roof sheets are already laid square, aligned correctly at the eaves and ridge, and fixed as specified. Verge flashing should finish the edge, not correct a roof that has wandered out of line.
You will also need to confirm whether you need a barge flashing, verge bargeboard, or a more specific folded trim for your roof type. On box profile and corrugated sheets, verge flashings are commonly made to suit the profile shape and cover the outer sheet edge with enough drop to protect the side.
Measure carefully. You need the roof slope length, the type of sheet, the profile dimensions, and the overhang detail. Allow for overlaps between flashing lengths, typically around 100mm to 200mm depending on the roof pitch and exposure. Short overlap lengths may be acceptable on sheltered roofs, but on more exposed elevations it is sensible to be more generous.
Tools and materials for the job
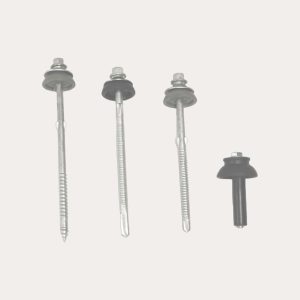
Most verge flashing installations are straightforward, but accuracy matters. You will usually need the verge flashing lengths, colour-matched stitching screws or self-drilling fixings, appropriate side fillers if specified, sealant tape where required, and safe access equipment.
A tape measure, drill driver, tin snips or suitable sheet cutter, straight edge and non-marking pencil will cover most of the work. If you are working with coated steel sheets and flashings, avoid cutting methods that overheat the material and damage the finish. A neat cut protects both appearance and service life.
How to install roof sheet verge flashing step by step
Start at the eaves and work upwards towards the ridge. That way, each successive flashing overlaps the one below it, helping shed water in the right direction. Dry-fit the first length before fixing anything fully. This lets you check the cover over the sheet edge, the line along the verge, and how the flashing sits against the profile.
The lower end should align neatly with the eaves detail. If it projects too far, it can look clumsy and catch wind. Too short, and the roof edge looks unfinished and exposed. There is no magic number for every roof because sheet profile, fascia detail and pitch all affect the final position.
Once you are happy with the fit, fix the flashing through the side face or crown positions as appropriate to the trim design and sheet type. Use the correct fixings rather than whatever is left in the van. Oversized or mismatched fixings can distort the flashing, while under-sized fixings may not hold securely over time.
Keep the line straight as you go. It only takes a few millimetres of drift at the bottom to make the top look off. On long runs, step back regularly and sight along the verge before fully tightening every fixing. This is a simple habit, but it saves rework.
Fit the next flashing length with the planned overlap. In most cases, a small bead of sealant or sealant tape within the overlap can help, especially on exposed sites. Do not overdo it. Excess sealant squeezed out everywhere is messy and usually a sign the detail has not been thought through.
Continue up the roof, repeating the same checks at each section. At the ridge, the top of the verge flashing should meet the ridge flashing cleanly. If these two details are not coordinated, you can end up with a weak point exactly where weather pressure is high.
Fixing positions and spacing
Fixing centres vary depending on flashing size, exposure and substrate, but consistency matters as much as strength. Uneven spacing looks poor and can lead to local distortion. As a rule, keep fixings neat, aligned and firm without overtightening.
This is where less experienced installers often go wrong. Drive the fixing too hard and you can crush the flashing or damage the washer seal. Leave it too loose and the trim may move, chatter or allow water in. You want snug and secure, not forced.
Sealing profiled gaps
On some roof profiles, especially deeper box profile or corrugated sheets, the shape of the sheet can leave open voids beneath the flashing edge. These may need profile fillers to close the gap. Without them, wind-blown rain, insects and debris can all find their way in.
Whether fillers are essential depends on the profile, pitch and building exposure. On a sheltered garden shed, some details are more forgiving. On a workshop in an open rural setting, the specification needs to be tighter.
Common mistakes when fitting verge flashing
The most common issue is ordering a flashing that does not suit the sheet profile. A standard folded trim might look close enough on paper, but once on site it can leave awkward gaps or sit proud where it should not.
Another regular mistake is trying to pull the flashing into shape with fixings. Flashing should fit the roof, not be forced to fit by screw pressure. That creates stress points, a poor finish and often oil-canning in the metal.
Poor setting out also causes trouble. If the sheets are not running true, the verge flashing line will highlight every error. The same applies to uneven overhangs and ridge details that were guessed rather than measured.
Finally, do not ignore edge support. Verge details work best when there is proper backing or support beneath as required by the roof design. A flashing fixed onto little more than fresh air is unlikely to stay tidy for long.
Choosing the right verge flashing for your roof
Not all flashings are equal. The right choice depends on your roof sheets, coating, building use and site conditions. A domestic garage may need a simple, neat trim in a colour-matched finish. An agricultural or commercial building may need heavier-duty folded flashings designed for more exposed conditions and longer runs.
Material and finish matter too. Matching plastisol-coated flashings with plastisol sheets gives a more consistent appearance and durability than mixing finishes. Gauge, fold accuracy and coating quality all affect how well the flashing performs over time.
For trade buyers, getting the exact trim detail agreed before delivery saves time on site. For competent DIY customers, a quick technical check before ordering can prevent an expensive mismatch. That is often the difference between a straightforward install and a lot of avoidable cutting and adjusting.
When to replace existing verge flashing
If the existing flashing is loose, corroded, visibly distorted or letting water in, replacement is usually the sensible option. Patching around failed edges can work as a short-term fix, but it rarely gives the same weatherproof finish as a correctly fitted new trim.
Replacement also makes sense when re-sheeting a roof. Reusing old verge flashings with new sheets often creates fit and finish problems, particularly if the profile or coating system has changed. Fresh sheets deserve properly matched accessories.
A better result starts with the full roof detail
Verge flashing might look like a finishing trim, but it is part of the roof system, not an afterthought. The neatest, strongest and most weather-resistant results come when the sheets, flashings, fillers and fixings are all chosen to work together from the outset.
If you are planning a roof build or refurbishment, take the extra time to get the verge detail right before materials arrive. It saves time on site, improves the finish, and gives the roof edge the protection it needs for the long haul. If you are unsure which flashing suits your sheets, Roof Sheets Online is here to help you get the right components first time.