A box profile roof can look perfect on day one and still cause headaches six months later – not because the sheets are wrong, but because the fixings are. Most call-backs on agricultural and light industrial roofs come down to three things: the wrong screw, the wrong washer, or the wrong technique (usually over-tightening).
Box profile sheets are stiff, strong and made to shed water fast. But that rigidity also means they will not “forgive” poor fixing habits. If you want a quiet, weatherproof roof that stays tight through winter storms and summer heat, your fixings choice matters as much as the sheet gauge and coating.
A fixing is doing more than just holding steel to timber or steel. It is clamping the sheet, sealing the hole, managing vibration, and coping with movement as the roof heats and cools.
When the wrong fixing is used, you usually see it in one of four ways. You get a slow drip around a screw after heavy wind-driven rain, you hear the sheet “chatter” in gusts, you see oval holes forming as the sheet moves, or you find rusty staining around the washers where water has been sitting.
The good news is that box profile roofing sheet fixings are straightforward once you match them to your build-up and install them with a bit of discipline.
Your first decision is what you are fixing into. That drives the thread type, the drill point, and the overall grip.
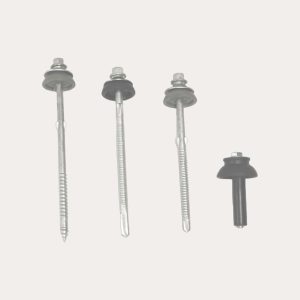
For timber, you want a self-tapping roofing screw designed for wood. These typically have a coarse thread that bites quickly and gives strong pull-out resistance. Length is not about “more is better” – it is about getting enough embedment into sound timber after passing through the sheet and any spacer, without being so long that the screw wanders or splits thin sections.
If you are fixing through insulation spacers or timber packers, measure the total thickness properly. Guessing is how you end up with fixings that either barely hold or bottom out before the washer compresses.
For steel, you need a self-drilling screw with a drill tip rated for the thickness of the purlin. This is where “it depends” comes in. Light gauge steel will take a standard self-driller, but heavier structural purlins need a drill point designed for thicker steel. If the drill point is wrong, you either burn out the tip (so it never drills cleanly) or you end up forcing the screw and damaging the washer before it even seats.
If you are unsure on purlin thickness, check the spec or measure it. It is a quick job and it saves a lot of grief.
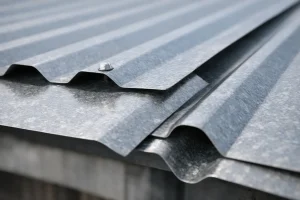
On a box profile roof, the washer is your seal. If that seal fails, the best sheet coating in the world will not help.
Most roofing screws come with a bonded washer – a metal cup with an EPDM rubber washer bonded underneath. EPDM is used for good reason: it handles UV and temperature swings better than cheaper rubbers.
Problems happen when:
A clean, correctly compressed EPDM washer should look neat and slightly flattened, not distorted. If you can see rubber squeezed out beyond the metal cup, you have gone too far.
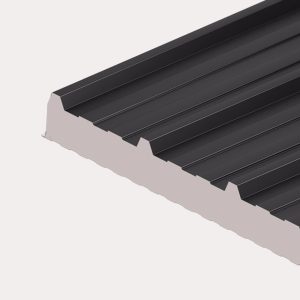
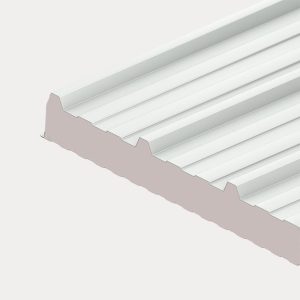
Box profile sheets have flats and ribs (the raised crowns). For most single skin box profile installations, the primary fixings go through the crest into the purlin below. That keeps the fastener out of the main water channel and improves water tightness.
Side laps (where one sheet overlaps the next) often need stitching screws, especially on roofs exposed to wind uplift. Stitching screws are smaller diameter and shorter, designed to pull the lap together without having to hit a purlin.
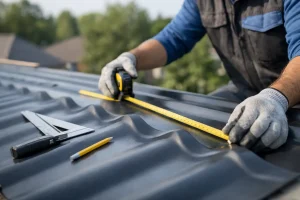
The exact fixing pattern depends on sheet profile, roof pitch, building location, and what you are using the building for. A stable or livestock building in a windy spot needs a more secure approach than a sheltered garden workshop. If you are trying to reduce noise and vibration, tighter and more consistent fixing centres help, but they must still allow the sheet to move naturally.
Even with the right fixings, poor installation can create problems that only show up after the first hard winter.
Self-drilling screws are designed to drill their own hole, but there are times pre-drilling makes sense. If you are working with thicker steel, aligning multiple layers, or you need absolute accuracy at laps and flashings, a pre-drilled pilot hole can keep everything true.
On the other hand, pre-drilling oversized holes in thin sheet can encourage movement and oval holes later if the sheet is not clamped properly. If you do pre-drill, keep it controlled and only do it for a clear reason.
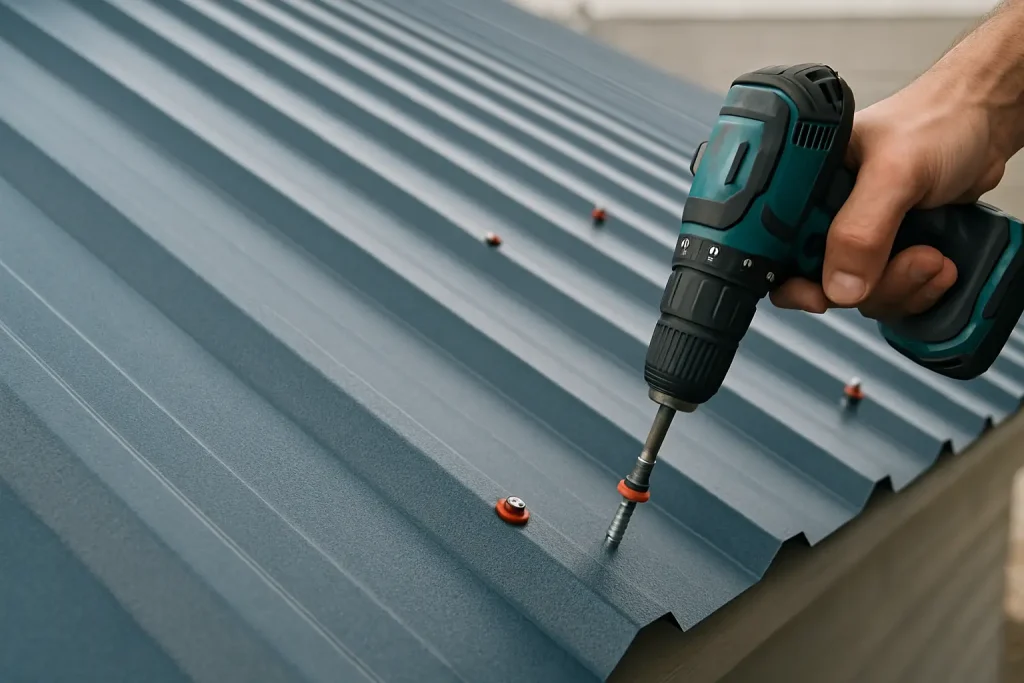
Box profile is strong, but you can still dimple the crest if you drive the screw too hard. That does two things: it damages the coating (opening up corrosion risk) and it creates a little “dish” where water can sit around the washer.
A drill with an adjustable clutch helps. Aim for firm compression of the washer, then stop. Consistency across the roof is more important than brute force.
Every self-drilled fixing creates swarf – tiny metal filings. If they sit on a coated sheet, they rust and stain, and in time they can pit the coating. Brush swarf away regularly, especially along laps and around fixings. It is a small job that keeps the roof looking sharp.
Mixing metals is a big one. Using incompatible fixings with certain sheet materials can accelerate corrosion, particularly in coastal or aggressive environments. If you are cladding a building near the sea or you are dealing with high ammonia environments (some agricultural uses), it is worth being stricter on fixing material and protective coatings.
Another frequent issue is using general-purpose screws with a random washer. Roofing fixings are purpose-built: the head shape, washer, and coating are selected to suit exposed weathering. Saving pennies on the wrong screw is usually the most expensive decision on the job.
Finally, watch out for poorly aligned purlins. If the purlins are not square, installers tend to “pull” sheets into line with fixings. That loads the sheet, stresses holes, and can cause rippling. It is better to correct the setting out than to ask the fixings to do structural work.
Roofs fail at the edges first. Ridge, verge, eaves and corner details take the wind and the weather, and they need the right approach.
Flashings are normally fixed with smaller stitching screws at appropriate centres to keep the laps tight and prevent wind lift. Where a flashing must be fixed into the structure, use the correct main fixing for timber or steel, but be careful not to over-compress thin folded metal. Neat pressure is what you want, not distortion.
If you are using sealing tapes or fillers under ridges and closures, make sure the fixings pull the metal down evenly across the tape. Gaps happen when fixings are spaced too far apart or driven at inconsistent pressure.
People often want a single number, but the honest answer is that it depends on exposure, building height, roof pitch, purlin spacing, and sheet length. A small shed roof in a sheltered garden does not need the same fixing density as a long-span agricultural building on open ground.
What you can control is buying enough to do the job properly without rationing screws at the end. As a rough planning habit, measure your purlin runs, check your sheet coverage, then allow for a sensible amount of side-lap stitching and extra for ridges, flashings, and the odd dropped screw. If you are matching an existing roof, take a look at the original fixing pattern and improve it where it was obviously light.
If you would rather not guess, that is exactly the sort of question we deal with every day. Roof Sheets Online is set up as a one stop shop for sheets and the full accessory pack, and our team can help you sanity-check the fixings and quantities before you place an order at https://www.roofsheetsonline.co.uk.
Not every project needs premium everything, but there are situations where spending a bit more on fixings is sensible. Coastal sites, exposed rural locations, buildings that will be heated (so they see bigger thermal movement), and any roof you cannot easily access for maintenance all benefit from better washer quality and protective coatings.
If you are fitting insulated panels or building a warm roof build-up, the fixing spec becomes even more important because the fastener is usually longer, the loads can be different, and you do not want to disturb the system later to chase a small leak.
A properly fixed box profile roof has a particular feel to it. The sheets sit flat without oil-canning, laps are snug, and there is no rattling when the wind picks up. After a heavy downpour, there are no tell-tale dark rings around washers and no slow drips that only appear when the rain comes in sideways.
If you take one thing to site, take this: treat fixings as part of the weatherproofing system, not an afterthought. Choose the right screw for the structure, keep the washers in good condition, drive them with consistent pressure, and clear the swarf as you go. A roof built that way does not just look tidy – it stays dependable, year after year.
A good roof is the one you forget about, because it just gets on with the job while you get on with yours.
Roof Sheets Online Ltd
UNIT C4
MACROME ROAD
Wolverhampton
WV6 9HD
Company No 15150940
Vat No. 4880 70856