That first sheet decides whether the whole roof looks crisp and professional – or whether you spend the afternoon fighting overlaps, wandering fix lines and a ridge that never quite lands. Box profile is forgiving in use, but it’s not forgiving on set-out. Get the basics right and you end up with a sleek, strong, weather-resistant roof that goes on quickly and stays put for years.
Before you start: confirm the roof build-up
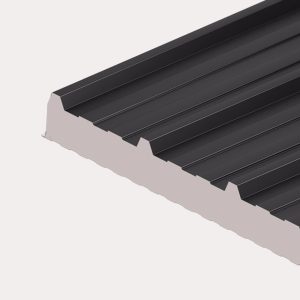
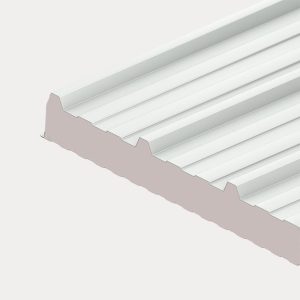
Box profile roofing sheets are commonly fitted to purlins on steel frames or to timber purlins/rafters on sheds, garages, workshops and agricultural buildings. Your sheet gauge, coating and fixing choice should match the environment – coastal air, livestock buildings and high-exposure sites are harder on materials and fasteners.
Start by checking the roof pitch and span against the sheet you’ve chosen. Most box profile systems will tolerate low pitches, but “it depends” on sheet length, side-lap detail and how you’re handling end laps. If you are anywhere near the minimum pitch for your profile, pay extra attention to sealing and avoid unnecessary end laps.
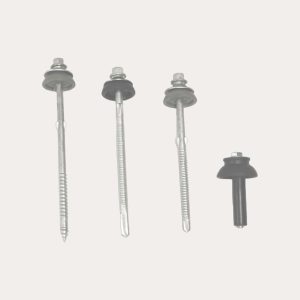
Also confirm you have the full accessory package on site. The sheets are only part of a watertight job – you’ll also need the correct fixings (with sealing washers), foam fillers, tapes, flashings (ridge, verge/barge, eaves, corners) and ideally matching touch-up paint for any minor edge work. If you want a true one-stop supply so nothing gets missed, this is exactly the sort of order we build every day at Roof Sheets Online Ltd.
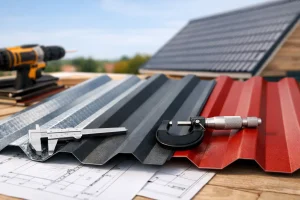
Tools, handling and safety (the unglamorous bit that saves time)
You do not need an exotic toolkit, but you do need the right approach. Use a tape, chalk line, spirit level, a drill/driver with clutch, and a nibbler or metal shears for cutting. Avoid angle grinders on coated steel sheets – the hot swarf can burn the coating and shorten the life of the finish, especially on plastisol.
Handle sheets with gloves and lift them properly. Long lengths can flex and kink if carried flat – support them on edge with two people. Keep the protective film (if supplied) on until the sheets are fixed, but do not leave it on for days in strong sun as it can bake on.
Working at height is not the place for guesswork. Use proper access equipment, fall protection where required, and never rely on the sheet alone as a walkway. If you must cross the roof, step where the sheet is supported by a purlin and spread your weight.
Setting out: where most fitting problems begin
Get your overhangs and eaves detail right
Decide the eaves overhang before you offer up the first sheet. Too little overhang and water can track back to the fascia; too much and the sheet can chatter in wind and look untidy. Your eaves flashing and gutter position should be planned so water drops cleanly into the gutter line.
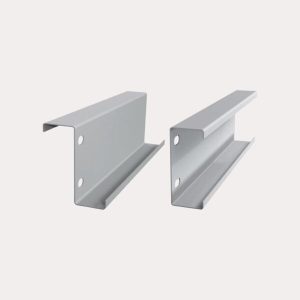
Check that your purlins are straight, in plane, and set at consistent centres. A roof that is out of square will force the sheets to “walk” as you go, and box profile ribs will make the error obvious.
Establish a true starting line
Pick the straightest edge to work from (often a gable/verge line). Mark a square reference line across the purlins using a 3-4-5 method or a framing square, then snap a chalk line. This line is your guide for the first sheet edge.
Do not assume the building is square. Measure the diagonals if you can. A small twist at the start becomes a big problem at the ridge.
How to fit box profile roofing sheets: the fitting sequence that stays straight
1) Dry place the first sheet and check everything
Offer up the first sheet so it sits with the planned eaves overhang and aligns perfectly to your reference line at the verge. Before you fix it, stand back and check the rib lines run parallel to the building edge.
Put in only two or three fixings initially – enough to hold the sheet while you confirm alignment on the next sheet.
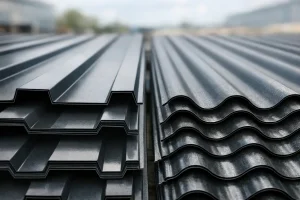
2) Side laps: keep them consistent and tight
Box profile sheets overlap along the side lap, usually one rib (profile dependent). The goal is a tight, consistent lap that doesn’t “tent” up.
If you’re fitting anti-capillary or lapped edges, make sure the correct rib is on top and that the lap faces away from the prevailing weather where practical. On exposed sites, a butyl side-lap tape can be a sensible belt-and-braces option, particularly on lower pitches.
As you add the second sheet, clamp the lap lightly (or hold it firmly by hand) so the ribs nest properly, then put a few fixings through to lock the pair together before fully fixing out.
3) End laps: avoid them if you can, seal them properly if you can’t
Single-length sheets from eaves to ridge are the cleanest solution and reduce leak risk. When sheet length or handling means you must use an end lap, it needs the right lap length and sealing.
End laps should land over a purlin and be sealed with butyl tape, with fixings positioned to compress the seal evenly. Don’t be tempted to “make it work” between supports – the sheet will move, and the lap can pump in wind and rain.
4) Fixings: position, compression and quantity matter
Most box profile roofs are fixed through the crest of the profile into the purlin using self-drilling fasteners with bonded sealing washers. Fixing through the crest helps keep water away from the hole and reduces the chance of a leak.
Set your drill/driver clutch so you compress the washer to a firm seal without squashing it flat. Over-driven fixings are a common cause of future leaks and premature washer failure; under-driven fixings can leave a tiny capillary path.
Fixing frequency depends on wind zone, sheet thickness, purlin centres and building use. As a rule, you’ll use more fixings at eaves, ridge and verges because those are the high-suction areas. If you are unsure, treat it as a specification question rather than a guess – it’s faster to ask than to retrofit more fixings later.
5) Keep checking line and rib run as you go
Every few sheets, run a tape measure from the eaves line to the sheet edge at the ridge end (or vice versa) to ensure the run stays square. It’s normal to make tiny adjustments sheet-to-sheet; it is not normal to keep forcing sheets into place.
If you spot the run drifting, correct it early by easing the last few sheets before fully tightening all fixings. Once everything is fully fixed, the roof will not “pull back” neatly.
Flashings and closures: where weatherproofing is won or lost
Eaves
At the eaves, use the correct eaves flashing and consider foam closures to stop driven rain, birds and insects getting under the sheet. If condensation control is important (common on garages, workshops and animal housing), a proper eaves detail helps manage airflow and drip paths.
Ridge
Ridge flashings should overlap adequately and be fixed securely with sealed fasteners. Use ridge foam fillers that match the box profile so you close the voids without crushing the sheet.
If you are adding a ridge vent detail, make sure the system is designed for it – random gaps under the ridge are not ventilation, they are a leak path.
Verges/bargeboards
Gable edges take wind and rain side-on, so a neat verge flashing with the right fixings makes a big difference to performance and appearance. Keep the verge line straight – your eye will follow it immediately from the ground.
Cutting, penetrations and rooflights
Plan cuts so they are minimised and kept to less visible areas where possible. For penetrations (flues, soil pipes), use the correct proprietary flashing and sealant approach for profiled sheets. Trying to “silicone your way out” of a poorly formed penetration is a short-term fix at best.
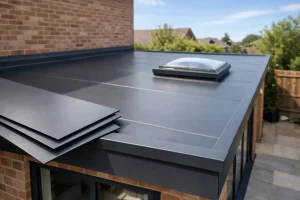
If you’re fitting rooflights, match the profile and thickness to your sheets so laps and fixings line up. Fit rooflights as part of the run, not as an afterthought, and treat them with the same care around sealing and fixing pressure.
Common fitting mistakes (and how to avoid them)
The most frequent issue is starting out of square and hoping it will disappear – it won’t. The second is over-driving fixings, which damages washers and can distort the sheet around the hole. The third is ignoring end-lap support or sealing, especially on lower pitches.
Another trade-off to be aware of is speed versus finish. You can throw sheets on quickly, but taking an extra 20 minutes to set your first line and pre-check overhangs often saves hours of frustration and produces a roof you’re proud to put your name to.
When to ask for help
If your roof is low pitch, highly exposed, unusually wide-span, or you’re mixing materials (for example insulated panels meeting single-skin sheets), get the specification checked. A quick call for technical guidance is cheaper than replacing wet insulation or reworking flashings after the first storm.
Fitting box profile roofing sheets is a straightforward job when you respect the set-out, the sealing and the fixings – and if you keep treating each detail as part of one weatherproof system, the roof will look sharp and perform exactly as it should for the long haul.