If a metal roof leaks at the highest point, the problem is rarely the sheet itself. More often, it comes down to the ridge detail – wrong overlap, poor closure placement, fixings in the wrong position, or a flashing that simply does not suit the profile below it. Get the ridge right and the whole roof performs better in wind, rain and day-to-day weathering.
That is why metal roof ridge flashing installation deserves a bit more care than a quick cap-and-screw approach. Whether you are finishing a garage, agricultural building, workshop or small commercial unit, the ridge flashing is what seals the meeting point of both roof slopes while still allowing the roof system to work as a whole.
What ridge flashing actually does
Ridge flashing sits over the apex where two roof sheets meet. Its job is straightforward – keep water out, protect the roof’s highest vulnerable line, and finish the roof neatly. On profiled sheeting, it also has to bridge the shape of the sheets below, which is where closures, fillers and correct fixing positions matter.
A well-fitted ridge flashing helps with weather resistance, reduces the risk of wind-driven rain getting under the sheets, and gives the installation a more professional finish. On some builds, it also plays a part in ventilation, depending on the ridge detail and the type of closures being used.
Before starting metal roof ridge flashing installation
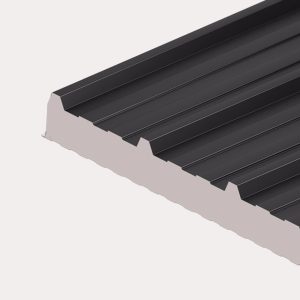
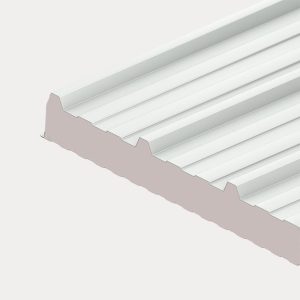
The first check is compatibility. Ridge flashings are not one-size-fits-all. The pitch of the roof, the profile of the sheet, and the material thickness all affect what will fit properly. A ridge that works on box profile may not sit correctly on corrugated sheeting without the right shaped fillers, and an angle that is too tight or too open can leave gaps at the edges.
You also need to check that the roof sheets themselves have been laid correctly before the ridge goes anywhere near the roof. The top ends of the sheets should be aligned, the sheet laps should already be fixed, and the ridge line should be straight. If the roof build-up is uneven, the flashing will only highlight it.
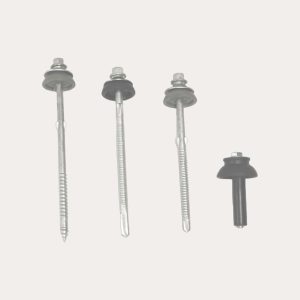
For most installations, you will need the ridge flashing sections, matching fixings with suitable washers, foam fillers or profiled closures, and sealant if the specification calls for it. Not every ridge detail should be heavily sealed. Sometimes a fully sealed ridge can trap moisture where some ventilation was intended. This is one of those areas where it depends on the roof system and building use.
Measuring and setting out the ridge
Start by measuring the full ridge length and planning your flashing joints before lifting anything onto the roof. This saves awkward cuts later and helps you place overlaps away from obvious stress points. Standard ridge flashings are usually supplied in workable lengths, so most roofs will need more than one piece.
Allow for overlap at each joint. As a rule, flashing sections should overlap sufficiently to shed water cleanly, with the lap facing away from the prevailing weather where possible. On many projects, 150mm overlap is a sensible starting point, though site conditions and manufacturer guidance can affect this.
If you are trimming a flashing on site, keep cuts neat and accurate. Ragged edges do not just look poor – they can affect how tightly the next section sits and may leave vulnerable points where water can track back.
How to position the ridge flashing correctly
When carrying out metal roof ridge flashing installation, the flashing should sit evenly over both roof slopes with consistent cover on each side. It needs to follow the ridge line without rocking or lifting. If it does not sit flat, stop and check the obvious causes: wrong ridge angle, uneven sheet ends, missing fillers, or a sheet profile mismatch.
On profiled metal roofing, closures are typically placed between the flashing and the sheet profile to fill the voids. Without them, you can leave open routes for insects, debris and wind-driven rain. With them, you get a much tighter weatherproof finish. The key is using the right closure for the exact sheet profile rather than trying to make a generic strip do the job.
Take time to set the first ridge piece straight. If the first section runs off line, every piece after it will follow. It is much easier to adjust at the beginning than after several lengths have already been fixed.
Fixing ridge flashing without causing problems
This is where a lot of avoidable issues start. Fixings need to secure the ridge firmly, but overtightening can distort the flashing, compress washers too far and reduce weather resistance instead of improving it. Tight enough to seat the washer properly is the aim. Crushed washers and dimpled metal are not a sign of a better job.
Fix through the correct part of the profile as specified for the roof system. On many metal sheet roofs, fixings for flashings are placed into the crown of the profile rather than into the pan, because that helps keep the fixing point above the main water path. The exact arrangement can vary by sheet type and flashing design, so it is worth checking before you start.
Keep fixing lines even and spacing consistent. A rushed pattern looks untidy and can leave weaker points in exposed locations. On buildings in more severe weather areas, ridge detailing needs even more care. Wind uplift at the ridge is not something to guess your way through.
Overlaps and joint detailing
Each overlap in a ridge flashing run should sit neatly and firmly, with no spread or twist between sections. If the flashing has a protective coating such as polyester or plastisol, avoid dragging one section roughly across another during fitting, as this can mark the finish.
Where sealant is required, apply it sparingly and in the correct location within the overlap, not smeared across exposed edges. Too much sealant often creates a mess without improving the detail. A clean mechanical fit with the right overlap usually does more of the work.
Closures, fillers and ventilation
This is one of the most common trade-offs in metal roof ridge flashing installation. A tightly closed ridge improves resistance to driven rain and pests, but some roof builds also need airflow to help manage condensation. That is especially relevant on outbuildings, agricultural spaces and cold roof constructions.
If condensation control is part of the design, the ridge detail should reflect that from the start. The right combination of anti-condensation backing, breathable layers, ventilation strategy and ridge closure matters more than forcing a fully sealed finish onto a roof that needs to breathe.
Common mistakes that lead to call-backs
Most ridge flashing problems come from specification errors rather than the flashing itself. Ordering the wrong angle, using closures that do not match the sheet profile, or fixing into poor positions can all leave a roof vulnerable.
Another common issue is trying to make the ridge cover too much. Ridge flashing is there to weather the apex, not to hide badly aligned sheet ends or compensate for poor sheet layout. If the sheets are out, the roof should be corrected before the ridge goes on.
There is also the temptation to mix and match components from different sources without checking compatibility. That can work sometimes, but it can just as easily create small fit problems that turn into leaks later. Buying sheets, flashings, fixings and fillers as a matched package usually saves time and avoids those headaches.
Choosing the right components for a longer-lasting finish
For trade buyers and capable DIY installers alike, the smartest approach is to treat the ridge as part of the full roof system, not an afterthought. The profile, coating, gauge, ridge angle and closures all need to work together. A sleek, strong, weather-resistant roof depends on the details just as much as the main sheets.
If you are ordering for a new build or refurbishment, it makes sense to source all supporting components together. That way, the ridge flashing is made to suit the roof covering and the fixings and fillers are selected to match. At Roof Sheets Online, that is exactly how many customers prefer to buy – one supplier, one order, and the right accessories ready to fit when the sheets arrive.
Final checks after fitting
Once the ridge is fixed, inspect the run from both sides of the roof and from ground level if possible. Look for uneven cover, lifted edges, missed fixings or closures that have shifted during installation. It is far easier to put right while access equipment is still in place.
If the roof is part of a larger project, do not let follow-on trades damage the ridge detail by standing on flashings or dragging materials across the apex. A well-installed ridge flashing should finish the job, not become the next snag.
A metal roof can only perform as well as its weakest detail, and the ridge is never a detail to rush. Get the fit, overlap and components right, and you give the whole roof a better chance of staying dry, secure and looking the part for years.