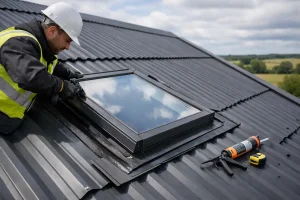
A boxtile sheet roof looks simple once it’s down – but most call-backs come from three avoidable issues: the roof isn’t square, the laps are wrong for the pitch, or the details (ridge, verge, eaves) were treated as an afterthought. If you want a tidy finish that stays weather-tight through driving rain and winter movement, plan the layout, use the right accessories, and fix to a sound structure.
This boxtile roofing sheets installation guide is written for typical UK outbuildings and light industrial or agricultural roofs – garages, workshops, stables, stores and lean-tos – where boxtile sheets are chosen for their tile-effect looks and fast coverage.
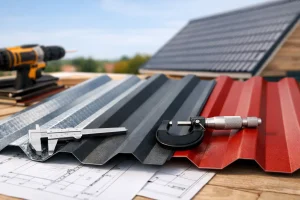
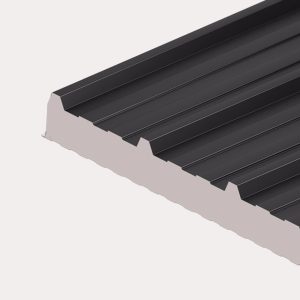
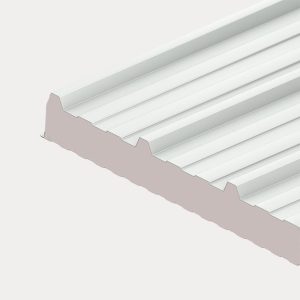
Boxtile sheets are profiled steel (or sometimes aluminium) formed to mimic a tiled appearance. They are strong for their weight, but they still rely on correct support spacing and fixing positions. Your exact purlin or batten centres depend on sheet specification, thickness and the manufacturer’s span tables, plus your site exposure. If the roof frame is too light, you will see “oil-canning” (visible waviness) and you will struggle to keep laps tight.
Pitch matters as well. Lower pitches demand more careful lap detailing and correct use of sealant tapes. If you are pushing the pitch down to the minimum to keep overall height under control, don’t guess – confirm what your chosen boxtile profile allows.
Finally, decide early whether you’re building a cold roof (single skin sheets with ventilation and condensation control) or a warm roof (insulated panels). Boxtile sheets are usually used as single skin. That’s fine, but you must think about condensation from day one, especially on stables, livestock buildings and workshops.
Start by checking the roof is square. Measure diagonals across the roof plane – if they don’t match, you are fighting the building. Small errors multiply across multiple sheets, and the tile-effect profile makes misalignment more obvious than on a plain box profile.
Mark a straight reference line at the eaves, then plan your sheet coverage so you don’t finish with a sliver cut at the verge. On many jobs it’s worth centring the layout so both sides land neatly under verge flashings.
Allow for overhang at the eaves so water reliably drops into the gutter, not back onto the fascia. Too short and water tracks behind the gutter; too long and the sheet can feel “soft” at the tail, plus wind can get under it. If you’re unsure, ask for guidance based on your gutter type and roof pitch.
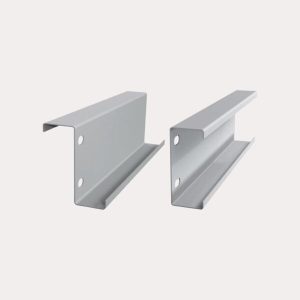
On a typical steel sheet roof you are fixing through the sheet into timber battens or steel purlins. The key is consistency – straight, level runs so the profile sits evenly and the fixings pull down without twisting the sheet.
For condensation control on a cold roof, you have a few workable routes, and which is best depends on use of the building. For general storage and garages, many customers choose an anti-condensation fleece-backed sheet, which helps manage dripping by holding moisture and releasing it when conditions change. For stables and high-humidity spaces, good ventilation at eaves and ridge becomes more important, and you may also specify rooflights carefully (they can become cold spots where condensation forms first).
If you are using a separate membrane, make sure it is compatible with your roof design and that you still maintain ventilation paths. A membrane that is trapped with no airflow can create problems rather than solve them.
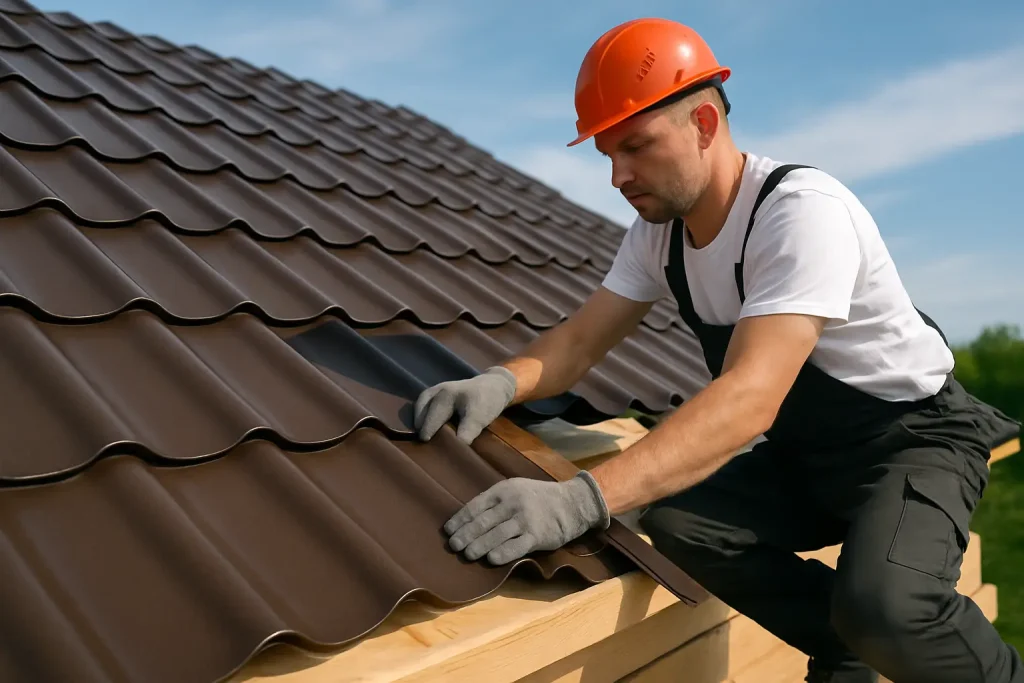
Boxtile sheets are large and act like sails in wind. Plan your lift and carry route, and never assume a “light breeze” is safe on a roof. Use proper edge protection and a method to stop sheets sliding before they’re fixed. Wear gloves for sharp edges and swarf, and eye protection when drilling.
When cutting sheets, avoid tools that burn the coating. Hot cuts can damage corrosion protection at the cut edge. Use appropriate cold-cutting methods, and always clean off swarf – those tiny metal filings rust quickly and stain the finish.
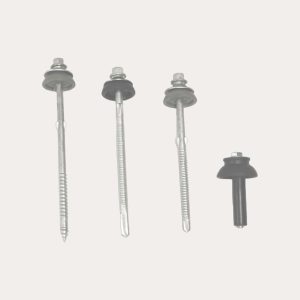
Most installations use colour-coded self-drilling or self-tapping fasteners with sealing washers, chosen to match the sheet and the substrate (timber or steel). The “right” fixing is not just about length – it’s about the drill point, the thread, the washer and the coating, so it lasts in UK weather.
Where do you fix? In general, you fix roofing sheets where the profile is designed to take the load and seal properly. For many steel profiles this means fixing through the crown rather than the trough, but always follow the guidance for your exact boxtile sheet because profiles vary.
Don’t over-tighten. The washer should compress to seal, not squash out. Over-driven screws split washers and distort the sheet, leading to leaks and premature corrosion around fixings.
Your roof has two lap types: side laps (sheet to sheet across the roof) and end laps (where one sheet overlaps the next up the slope). The required lap size and whether you need sealant tape depends on pitch and exposure.
Side laps must be consistent along the full sheet length. If you “pull” a sheet to correct the line at one end, you can open the lap at the other. Take your time on the first run, get it straight, and everything else follows.
End laps need solid support. Don’t let an end lap float between purlins – it will flex under wind and foot traffic and will eventually work the seal. Plan purlin positions so both sheets at an end lap are fixed down properly.
Sealant tapes are not there to compensate for poor set-out. Used correctly, they improve weather resistance at lower pitches and exposed sites, especially on end laps and around penetrations. Used badly, they create a mess and still leak.
Most competent installers find this order keeps the job controlled.
Install eaves fillers (where specified), eaves flashings and guttering positions before you start laying sheets. It’s much easier to get a crisp line and correct drip detail now than when you’re leaning over a finished roof.
Start from the end that best suits wind direction and access, and align the first sheet square to the eaves line and verge. This first sheet sets the whole roof. Fix it lightly at first so you can make minor adjustments, then complete the fixing pattern once you’re happy.
Add the next sheet, check the side lap is fully engaged, and only then fix. Keep checking alignment every few sheets. If the roof is slightly out of square, you can sometimes “lose” a small amount gradually – but do it knowingly, not by accident.
When you reach an end lap, confirm you have purlin support under the lap and apply sealant tape if your pitch/exposure calls for it. Then overlap and fix down following the recommended fixing positions.
Rooflights should match the sheet profile. Treat them like a system component, not a universal add-on. For flues, vents and pipe penetrations, use proper flashings sized to the profile and pipe diameter, and don’t rely on mastic alone.
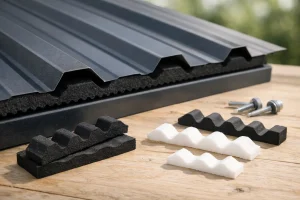
Ridge cappings need correct overlap direction and sealing where required. Verge flashings should cover neatly without forcing the sheet edge down. This is also where foam fillers and closure pieces matter – they reduce wind-driven rain and pests getting into the roof space.
A boxtile roof only stays weatherproof if the “edges and joins” are treated as part of the roof, not optional extras. Ridge pieces, barge/verge flashings, sidewall and headwall flashings, foam fillers, butyl tapes and fixings are the components that stop water tracking sideways, blowing up and under, or wicking back at laps.
This is where the one-supplier approach saves time on site. When your sheets, flashings and fixings are designed to work together, you avoid the common problem of trying to make a trim from a different system fit a boxtile profile. If you want everything in one order with the right supporting components and delivery date confirmation, Roof Sheets Online Ltd can supply the full package via https://www.roofsheetsonline.co.uk.
If fixings are “spinning”, you’re either using the wrong fastener for the substrate, drilling oversized holes, or your purlin/batten material is too thin or degraded. If sheets look uneven, check purlin lines for bowing and confirm you’re not over-tightening some fixings and under-tightening others.
If you get leaks at laps, the usual culprits are insufficient lap for the pitch, missing sealant tape where it’s needed, or an end lap without proper support. Leaks at the ridge are often down to missing fillers or poor overlap direction in exposed wind.
Boxtile is a smart choice when you want a sleeker, tile-effect look without the weight and labour of traditional tiles – but it rewards the installer who treats it like a system. Get the pitch and set-out right, choose fixings that match your structure, and don’t skimp on flashings and fillers. If you want a roof that goes on quickly and stays tight for years, the best investment is a little planning before the first sheet ever hits the purlins.
Roof Sheets Online Ltd
UNIT C4
MACROME ROAD
Wolverhampton
WV6 9HD
Company No 15150940
Vat No. 4880 70856