
A corrugated rooflight can transform a dark shed, workshop or agricultural building, but only if it is fitted properly. Install corrugated rooflights correctly and you get clean daylight, dependable weather protection and a longer-lasting roof. Get the details wrong and you can end up with cracked sheets, leaking fixings or a panel that moves too much in hot and cold weather.
That is why rooflights should never be treated as an afterthought. They need to match the roof profile exactly, work with the sheet layout, and be fixed in a way that allows for expansion without sacrificing weather resistance. For trade installers this is standard good practice. For competent DIY buyers, it is usually the difference between a job that performs well for years and one that needs remedial work after the first bad spell of weather.
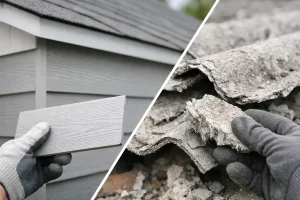
Corrugated rooflights are not fitted in quite the same way as standard metal sheets. They look similar from ground level, but the material behaves differently. GRP and polycarbonate rooflights expand and contract more than steel, so over-tightening fixings or drilling holes too tight can cause stress around the fixing points. That is often where cracks begin.
There is also the issue of water management. A rooflight panel sits in the same run as the surrounding sheets, so any poor lap, unsupported edge or badly seated fixing washer can become a leak path. On a garage or garden building that is annoying. On a stable, workshop or agricultural unit, it can become a much more expensive problem.
The right installation method protects the sheet, the roof structure and the building below it. It also helps preserve light quality. A poorly aligned rooflight can bow, dip or sit unevenly, which affects both appearance and performance.
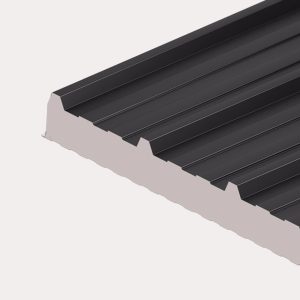
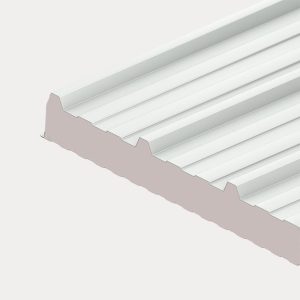
Start with compatibility. The rooflight must match the corrugated profile of the surrounding roofing sheets. That includes the pitch of the corrugation, the width and the side lap arrangement. A rooflight that is only nearly right is not right enough. Even a small mismatch can leave gaps, poor overlaps and fixing issues.
You also need to check the roof pitch. Most corrugated roofing systems have a minimum recommended pitch, and rooflights should be installed in line with that guidance. A low pitch makes overlap details more critical because water drains more slowly. In those cases, a longer end lap and careful sealing become even more important.
Before lifting anything onto the roof, set out the sheet run properly. Decide exactly where the rooflights will sit so they provide useful daylight rather than random bright patches. In working buildings, rooflights are best placed to spread light evenly across the space. In smaller domestic structures, a pair of well-positioned sheets often works better than clustering several panels together.
Rooflights need careful handling on site. Dragging them across rough surfaces or stacking them badly can mark or stress the sheets before installation even begins. Keep them clean, supported and protected from unnecessary impact.
When cutting is required, follow the manufacturer guidance for the material type. Not every rooflight should be cut in the same way, and using the wrong blade or creating too much heat can damage the edge. In many cases, ordering the correct length in the first place is the better option.
Pre-drilling is one of the steps that gets rushed most often. Fixing holes should be drilled neatly and slightly oversized to allow for thermal movement. If the hole is too tight around the fixing, expansion has nowhere to go. If it is too large or ragged, you risk poor sealing and sheet movement. Clean, well-positioned holes matter.
Position the rooflight so it follows the same line and overlap pattern as the surrounding corrugated sheets. Side laps should be consistent, and the end lap should meet the roof system recommendation for the pitch and exposure. If the roof is in an open, wind-driven location, do not be tempted to cut lap lengths too fine.
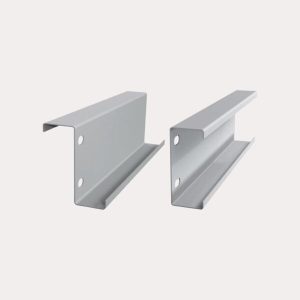
Support is equally important. Rooflights should be fixed over suitable purlin centres and must not be left spanning unsupported areas beyond their capability. A translucent sheet is not there to make up for poor structure. If the purlin spacing is wrong for the product, the rooflight can flex excessively, pond water or fail around the fixings over time.
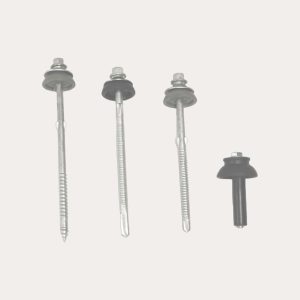
Fixings should be installed through the correct part of the profile, using the recommended rooflight fixings and washers. Tighten them enough to seat the washer and form a weatherproof seal, but not so much that the sheet is crushed. This is where many leaks and cracks begin. Installers used to steel sheets sometimes apply too much pressure by habit. Rooflights need a more controlled hand.
If using foam fillers, stitching screws or sealants as part of the roof build-up, make sure they are suitable for the profile and positioned correctly. These small components are often what keep wind-driven rain, insects and debris out of the building. A roof is only as good as its details.
One of the most common errors is mixing profiles or assuming one corrugated rooflight will suit any corrugated sheet. It will not. The fit has to be exact.
Another issue is poor drilling practice. Holes drilled without allowance for movement can lead to stress fractures, especially on south-facing roof slopes that see higher temperature change. Equally, fixing too close to the sheet edge can weaken the panel and create splitting.
Walk traffic is another risk. Corrugated rooflights should never be treated as load-bearing access points. During installation and later maintenance, foot traffic should be controlled properly with crawling boards or other safe access methods. A damaged panel may not fail immediately, but the weakness will often show up later.
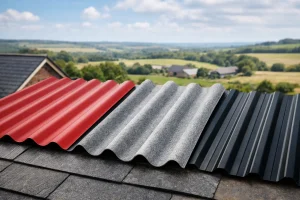
There is also a judgement call around how many rooflights to use. More light is not always better. Too many translucent sheets can create glare, uneven temperature gain and a roof appearance that looks patchy. For most projects, balanced daylight is the goal, not maximum transparency.
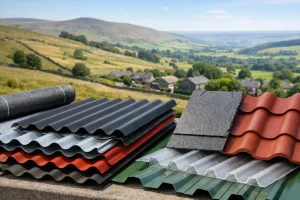
Not every building needs the same rooflight specification. A simple garden outbuilding may only need a practical daylight panel that matches the existing corrugated sheet. A workshop, farm building or commercial unit may need higher impact resistance, better light diffusion or a specification suited to a more demanding environment.
This is where product choice matters just as much as fitting. If the building is exposed, heavily used or expected to perform for years with minimal maintenance, it makes sense to choose trade-grade sheets and the correct matching accessories from the start. That avoids the stop-start process of sourcing fixings from one place, fillers from another and then discovering the profile does not line up on site.
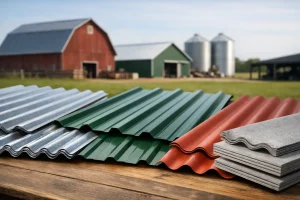
For buyers planning a full roof rather than replacing a single panel, taking a complete-system approach usually saves time and hassle. Getting sheets, rooflights, fixings, flashings and support components specified together reduces the chance of mismatch and helps the installation go more smoothly.
There are jobs where the standard method needs more care. Coastal locations, high wind areas and low-pitch roofs all demand tighter attention to laps, fixings and weatherproofing. Older buildings can also introduce challenges, especially if purlin centres are inconsistent or the existing roof profile is not what was originally expected.
Refurbishment work is rarely as straightforward as a clean new build. You might find twisted timbers, legacy fixings in awkward positions or previous patch repairs that affect sheet alignment. In those situations, slowing down the layout stage is well worth it. It is far easier to correct the plan before fixing than to force a rooflight into a run that does not really suit it.
If you are unsure, ask before ordering. At Roof Sheets Online, we help customers match profiles, fixings and accessories so the materials arriving on site are ready for the job rather than leaving you to improvise halfway through the install.
Once the rooflights are installed, inspect every fixing line and overlap. Check that washers are seated evenly, sheets are aligned cleanly and there is no sign of localised distortion around the holes. A panel that looks strained usually is strained.
It is also worth checking the roof internally during the first spell of heavy rain. A quick look from inside can reveal whether a lap or fixing needs attention before a minor issue becomes a persistent leak. That kind of early check is simple, practical and often overlooked.
Good rooflights should bring light into the building without bringing weather in with them. If the profile is matched, the fixing method is right and the sheet has room to move as temperatures change, the result is tidy, durable and fit for purpose. Get those basics right and the roof will do what it is supposed to do – stay weatherproof, stay bright and stay dependable.
Roof Sheets Online Ltd
UNIT C4
MACROME ROAD
Wolverhampton
WV6 9HD
Company No 15150940
Vat No. 4880 70856