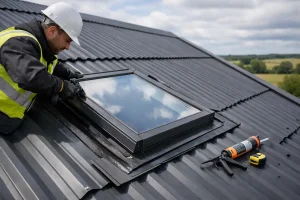
A rough cut on a roofing sheet rarely stays a small problem. One burred edge can scratch the coating, throw out your lap, and leave you fighting with flashings later. If you are looking at how to cut metal roofing sheets, the job is not just about getting through the steel – it is about keeping the sheet straight, protecting the finish, and making sure the roof still performs once it is fixed in place.
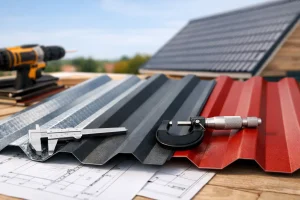
The right cutting method depends on the sheet you have in front of you. A thin polyester-coated corrugated sheet is not cut in quite the same way as a thicker box profile panel, and neither should be treated like an insulated composite panel. Get the method right and you keep the coating intact, the fit tight, and the installation moving.
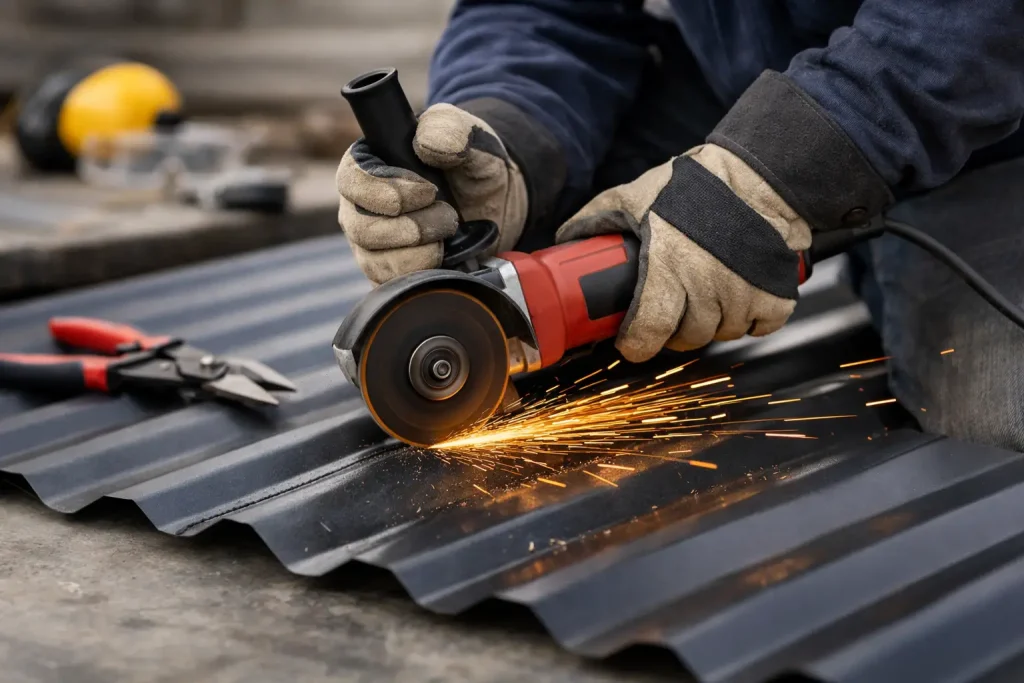
The biggest mistake people make is reaching straight for the wrong power tool. It is quick, it is familiar, and it seems like it will save time. In many cases, especially with coated roofing sheets, an abrasive disc creates more trouble than it solves. The heat and sparks can burn the protective finish, damage the galvanised layer, and leave hot metal particles embedded in the surface. Those particles can rust and stain the sheet surprisingly quickly.
For most metal roofing sheets, a cold-cutting method is the safer choice. That usually means nibblers, shears, a jigsaw with the correct metal blade, or specialist circular saw blades designed for coated steel. The cleanest option depends on the profile, thickness, and whether you are trimming lengthways, cross-cutting, or shaping around details.
Before you start, check the manufacturer guidance for the specific product. Some sheet types are more tolerant than others, and insulated panels in particular need a more controlled approach. If you are unsure, it is worth asking for technical advice rather than risking expensive sheets.
Single-skin steel sheets such as box profile and corrugated roofing are generally straightforward to trim if they are properly supported. Flat sheets are simpler again because the cut line stays consistent. Fibre cement sheets are a different category altogether and need their own cutting tools and dust controls, so they should not be treated like metal sheets.
If you are cutting insulated roofing panels, take extra care. You are not only cutting through the outer and inner metal facings, but also the insulated core. A poor cut can tear the facing, crush the insulation, or leave an untidy edge that affects flashings and weatherproofing. On those products, accuracy matters even more.
There is no single best tool for every cut. The best tool is the one that gives you a clean edge with minimal damage to the finish.
Hand shears work well for small notches, minor trimming and awkward detailing, but they are slow on long runs and can distort thinner sheets if overworked. Electric shears are faster and leave a neat edge, especially on straighter cuts, though they can be less convenient on deeper profiles.
Nibblers are a strong option for profiled metal roofing because they can follow contours well and cut without generating damaging heat. They do leave a trail of small metal chippings, so you need to clear those away from the sheet immediately. Leave them sitting on the surface and they can mark the finish.
A jigsaw fitted with a fine-tooth metal blade is useful for shorter cuts, cut-outs and more detailed work. It is often a sensible choice when you need control rather than speed. Support the sheet properly and keep vibration down, otherwise the cut can wander.
A circular saw with a purpose-made metal cutting blade can be efficient for straight cuts across multiple sheets, particularly on site where time matters. The key point is that it must be the correct blade for coated metal roofing sheets. A standard abrasive disc is not the same thing.
Angle grinders with abrasive discs are widely used because they are on hand on many jobs, but they are generally not the preferred option for coated roofing sheets. The heat, sparks and swarf can shorten the life of the sheet and damage the finish around the cut. If long-term performance matters – and on a roof it always does – cold cutting is the better route.
That is the trade-off in simple terms. A grinder may feel quicker in the moment, but a cleaner cutting method is usually better for the roof you are building.
Good cutting starts before the tool touches the sheet. Set the sheet on stable supports so it cannot chatter or sag. If the panel vibrates, the cut quality drops and the coating is more likely to get marked.
Measure twice, then mark clearly with a pencil or non-scratch marker. Avoid anything that could score the surface unnecessarily. On profiled sheets, keep an eye on where the cut line falls across the ribs and pans. A line that looks square on one edge can drift over the profile if it is not checked properly at both ends.
If you are cutting several sheets to the same size, it is worth setting up a repeatable process rather than measuring each one from scratch. That saves time and helps keep the roof lines consistent once the sheets are laid.
Wear gloves, eye protection and suitable clothing. Freshly cut sheet edges are sharp, and metal swarf is easy to overlook until it is in your hand or eye. For power tools, hearing protection is sensible as well.
Take your time on the first sheet. If you rush the first cut and it is out by even a small margin, every matching sheet after that will carry the same problem.
Keep the sheet supported close to the cut line, but leave enough clearance for the tool to work. Feed the tool steadily rather than forcing it. Push too hard and you can tear the coating, distort the profile or wander off line. Let the blade or cutter do the work.
On long cuts, especially with profiled roofing, it often helps to have a second person supporting the offcut. That stops the waste piece dropping away and pulling against the cut edge. It is a small detail, but it makes a real difference to the finish.
Once the cut is complete, brush away all swarf and chippings straight away. Do not wipe them across the surface, as that can scratch the finish. Lift them off or use a soft brush. Then inspect the cut edge for burrs or damage.
Cross-cutting across the sheet profile is usually more demanding because the tool has to work through each rib and valley cleanly. A nibbler, shear or suitable circular saw often handles this better than basic hand tools.
Lengthways cuts can be trickier to keep visually straight, particularly on long roof sheets. Using the profile as a guide helps, but only if the original sheet is laid square and your marks are accurate. If appearance matters, and it usually does on visible roof slopes and side cladding, take more time setting up the cut than you think you need.
Not every cut is a straight trim. On real projects you may need to cut around rooflights, penetrations, wall abutments or verge details. This is where planning pays off.
Mark the full opening carefully and think about the order of cuts before you begin. On detailed cut-outs, a jigsaw or nibbler usually gives better control than a larger saw. Drill a starter hole if needed so you can begin the cut neatly without forcing the tool into the sheet.
Keep in mind what will cover the cut afterwards. A flashing may hide a small tolerance, but it will not compensate for a badly torn edge or a panel that has been overcut into the visible area. Precision here makes the whole roof look better once complete.
A clean cut is only part of the job. Once the sheets are trimmed, handle them carefully to avoid edge damage before installation. Store them off the ground, keep them dry, and do not drag one sheet across another.
If the product guidance calls for edge treatment or touch-up on exposed cuts, follow it. Not every sheet requires the same aftercare, so this is another area where the exact product specification matters. What works for one coated steel sheet may not be the right answer for another.
This is also why buying the full roofing system from one specialist supplier makes life easier. Getting the sheets, fixings, flashings and trim details lined up from the start reduces the need for avoidable site adjustments and last-minute cutting.
If you are trimming a few sheets for a shed or garage, careful preparation and the right tool will usually see you through. If you are working with long runs, insulated panels, or more technical detailing, it is worth checking the cutting method before you start. One wrong decision can waste costly materials and delay the job.
At Roof Sheets Online, we know most buyers want the same thing – the right materials, the correct accessories, and no surprises once installation begins. If you are unsure which sheet type you have or how best to cut it cleanly, getting proper advice early is a lot cheaper than replacing damaged panels.
A neat roof often comes down to the small decisions made on the ground. Cut carefully, protect the coating, clear the swarf, and the sheets will go on looking as they should.
Roof Sheets Online Ltd
UNIT C4
MACROME ROAD
Wolverhampton
WV6 9HD
Company No 15150940
Vat No. 4880 70856